Monday, December 31, 2012

Top 10 of 2012

It's been a long, sinus-y, headache-y road back to finally feeling normal. I've been gone way longer than I had planned because on our drive back from Christmas in Michigan, I started feeling feverish and went downhill fast once we got home. At least I wasn't sick during Christmas!

Now that I'm finally feeling better, I decided to slide in a Top 10 post at the last second.

If you've been here since the beginning only a few short months ago, or just here for the first time today, thanks so much for your support! It's been a blast so far and I'm so excited for this coming year.

You'll have to excuse some of the photos, it's still very much a work-in-progress.

Without further ado....


You all obviously love your treats... Have a great New Year's and we'll see you next year!

Pinit

Wednesday, December 19, 2012

Chicken Pot Pie


I have a confession: Today is my hubby's birthday and I don't have a cake! He requested a cheesecake which has to be done ahead of time and things have been so hectic lately with our daughter not going to sleep easily like she used to...I feel like a horrible wife! Thankfully he understands and I should have time to put it together today. But that still means waiting a day to eat it. I really dropped the ball on that one and feel so bad.

It's a good thing I made him this pot pie yesterday to help cushion the let down of today. I made this for the first time while we were in Florida and it's one meal that he will specifically ask for every so often.


There's nothing fancy about this, but that's the beauty of a pot pie, right? It's classic comfort food. You don't even have to make the crust on your own. If you have the chicken cooked ahead of time, this recipe is just a little stirring, a little heating, and a little baking. It couldn't be easier.


Chicken Pot Pie
Adapted slightly from this recipe
Serves 6

1 pound puff pastry, preferably one containing butter, thawed
4 tablespoons unsalted butter
4 carrots, sliced
1 large yellow onion, roughly chopped
1/4 cup whole wheat pastry flour or all-purpose flour
3 cups chicken broth (homemade or store bought)
1/2 teaspoon ground mustard
1 teaspoon dried thyme
1/2 teaspoon dried rubbed sage
1 cup frozen peas
2 large boneless, skinless chicken breasts, cooked and cubed

Preheat oven to 400 degrees F.

Place one sheet of puff pastry (there should be two sheets) on a lightly floured surface and roll out to about a 12-inch square. Place in a 2 1/2-quart round casserole dish. Trim overhanging edges and use scraps to fill in empty spaces if necessary. Prick surface of pastry with a fork in multiple places.  Line dish with a piece of aluminum foil and weigh down with pie weights or dry beans. This will prevent the crust from shrinking and sliding down into the dish.

Bake for 25 minutes.

Meanwhile, in a large saucepan over medium heat, melt butter. Cook carrots and onion for about 5 minutes or until softened slightly, stirring occasionally.

Add flour, stirring frequently, until flour lightly browns and begins to stick to the bottom of the pan.

Once flour is cooked and evenly coats the vegetables, add the broth and bring to a boil. Lower heat to medium-low and simmer until sauce thickens.

Add ground mustard, thyme, sage, peas, and chicken, stirring until combined. Remove from heat.

On a lightly floured surface, roll out the second sheet of puff pastry to a 12-inch square. Cut into 1-inch strips.

Pour warm filling into the casserole dish and cover with the strips of puff pastry, forming a lattice pattern. If the filling comes very close to the top of the dish, you may want to place a baking pan under in case the filling bubbles over. Cover the dish with a piece of aluminum foil and bake for 30 minutes. Remove aluminum foil and allow pastry to brown for an additional 5 to 10 minutes if necessary.


Pinit

I'm linking up this recipe at Little House In The Suburbs.

Tuesday, December 18, 2012

Bittersweet Chocolate Peppermint Cookies


This weekend has been a little sad, thinking about all of those poor families that have lost loved ones so tragically. Any time of year is hard to lose someone you love, but being so close to Christmas will probably make things especially hard for them. Being a parent, my heart aches for them and I pray that they find just a small amount of peace and comfort in these coming months.


I think I have found my new favorite cookie recipe...There is a small amount of peppermint, being that I wanted to make it a little Christmas-y. The outsides of the cookie become a tiny bit crackly and crispy, while the insides remain gooey, rich, and soft. Plus, this batter is out of this world! I've never been afraid of raw cookie dough, so if you're equally reckless, you'll want to try that.

There is no shortage of chocolate here. And isn't that what a good chocolate cookie is all about?

Because there is so little flour in this recipe, you'll need about an hour in the fridge to allow the cookies to firm up enough to scoop.

If you have anybody in your life right now that could use a little treat, these would be perfect! I'm sure we can all thing of someone...

I'm pretty sure this girl will be whipping up a batch of these on her own before I know it! In fact, we had an occupational therapist at our house once that was shocked to see one of my brothers push a chair up to the stove and scramble his own eggs! 


Bittersweet Chocolate Peppermint Cookies
Adapted from this recipe
Makes 2 dozen

10 ounces bittersweet chocolate, chopped (reserve 4 ounces)
4 tablespoons / 1/4 cup unsalted butter, cut into pieces
1/3 cup all-purpose flour
1/4 teaspoon baking powder
1/2 teaspoon sea salt
2 teaspoons cocoa
2 large eggs
1 cup sugar
2 teaspoons vanilla extract
1/2 cup dark chocolate and mint morsels

Heat about 1 inch of water in a saucepan until simmering. Place 6 ounces of the bittersweet chocolate and butter in a heat-proof bowl and place over the simmering water. Stir until fully melted and smooth. Remove from heat and allow to cool.

In a small bowl, whisk together the flour, baking powder, salt, and cocoa.

In a large mixing bowl, with a paddle attachment, cream together the eggs, sugar, and vanilla on medium-high speed for 5 minutes. The batter should fall off the paddle in ribbon-like sheets.

Using a wooden spoon, gently stir in the melted chocolate, followed by the flour, remaining 4 ounces of chopped chocolate, and morsels. The batter will be a similar consistency to brownie batter.

Place in refrigerator for 1 hour.

Preheat oven to 350 degrees F.

If the batter is too firm to scoop, you may have to chop it with a spoon to break it up. Place tablespoon-sized balls of dough on a cookie sheet, leaving about 2 inches between each cookie. The dough may be quite crumbly, so press any stray crumbs back into the dough using your fingers.

Sprinkle the top of each cookie with a tiny amount of sea salt.

Bake for 8 to 10 minutes, rotating pan after 5 minutes.

Allow to cool on pans for 5 minutes then carefully move to cooling rack to finish cooling.

These are best served slightly warm. If storing, keep in an airtight container at room temperature for a few days, or in the freezer for a few months.


On an unrelated note, I just found out yesterday that I won a Silhouette Cameo from The Better Half! I share my recipes all the time at their link parties and they have some very talented folks there. I'm obviously going to use my new Cameo for crafty things, but I'm making it my mission to use it somehow with my food. I'll keep you posted on that!

Have a great week!

Pinit

I'm linking up this recipe at an extra-special link party this week. Many bloggers got together to host a link party in support of the Sandy Hook tragedy and $1 will be donated for each link posted. So be sure to check them out and link up if you have a blog. 

I'm also linking up this recipe at Taste and Tell, Crazy for Crust, Homestead Revival, and Sweet 2 Eat Baking.

Sweet 2 Eat Baking

Monday, December 17, 2012

Friday, December 14, 2012

Meat Lover's Breakfast Casserole


Every Wednesday night I take a few hours off to do something by myself. All you moms know that if you don't, you're "on call" 24/7. I'm the type that thrives on my alone time, so when I don't get it, I turn into a major beast. When somebody always needs me, it's exhausting! Don't get me wrong, I'm happy that I get to stay home.

Anyways, since Nick get's home pretty late, I don't have too long to escape, but long enough. I usually head straight to Jo-Ann's, which is strange because I wouldn't describe myself as the crafty type. There's always something there I can't pass up! Especially now that I'm trying to do more homemade gifts this Christmas. Since Nick isn't exactly setting the knitting needles a flaming, it falls on me. Although that would be fun to see...

We're back at it again. Meat. I adore you. Having meat with breakfast, lunch, and dinner makes me happy. Now if we could just figure out how to sneak it into chocolate...I'm kidding!

Most breakfast casseroles like this have bread, but I decided to nix that since if I'm going to eat 'bread' I'd rather it come from a cookie or something similar.

I'm not kidding when I call this a Meat Lover's, so if you're having this with a few other things along side, you can half the amount of beef. Or just eat less. Duh.

Wow, I'm starting to get a little snarky, which means I better wrap this up and get something to eat!


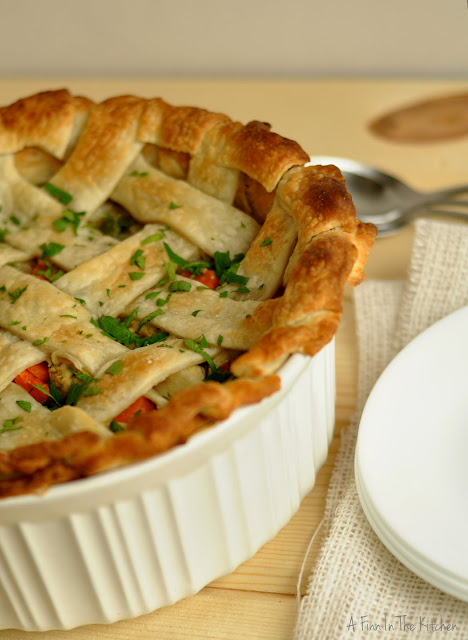
Meat Lover's Breakfast Casserole (AKA Christmas Morning Fuel)
Inspired by this recipe
Serves 6

1 yellow or white onion, peeled and thinly sliced
3 tablespoons extra-virgin olive oil
1 pound ground beef or ground sausage
1 teaspoon Sausage Seasoning (recipe below - omit if using ground sausage)
5 slices bacon, chopped into small pieces
8 large eggs
1 1/2 cups whole milk
1/2 teaspoon dry mustard
1/4 teaspoon ground nutmeg, preferably fresh
1/2 teaspoon dried chives
1/4 teaspoon sea salt
1/4 teaspoon pepper
1 cup shredded Monterey Jack cheese
1 cup shredded cheddar cheese

Preheat oven to 350 degrees F.

Grease a 1 1/2- or 2-quart casserole dish with 1 tablespoon olive oil.

Heat 1 tablespoon olive oil in a large saucepan over medium heat. Add onions and cook until lightly browned, stirring occasionally, about 8 minutes. Remove onions to a bowl.

In the same pan, add another tablespoon olive oil with beef, Sausage Seasoning, and bacon. Cook until beef is browned and bacon is crispy. Drain.

In a large bowl, whisk together the eggs, milk, mustard, nutmeg, chives, salt, and pepper.

Add your ingredients to the greased casserole dish in the following order: meat, half of your cheese, onions, egg mixture, and remaining cheese.

Bake, uncovered for 40-50 minutes. It's done when the top has browned and there is only a small amount of jiggling (if any) when you shake the dish.

Allow to cool for 10 minutes and serve warm.

Sausage Seasoning
From Practical Paleo (not an affiliate link)
Makes 4 1/2 tablespoons

1 teaspoon sea salt
1 tablespoon fennel seeds
1 tablespoon sage
1 tablespoon garlic powder
1 tablespoon onion powder
2 teaspoons dried parsley
1 teaspoon black pepper

Combine in a spice or coffee grinder, or small blender. Store in a small covered container.

And yes, my lovely farm eggs really are this yellow!

Pinit

I'm linking up this recipe at One She Two She, One Project Closer & Design Dining and Diapers.

Wednesday, December 12, 2012

Spicy Avocado Chicken Enchiladas


This is just the kind of meal that the doctor ordered after all the Oreos I ate today and yesterday. This is probably the first time since starting my blog that my creation didn't make it to the freezer. (That thing is a major part of my "keep-the-weight-and-bloat-off-plan".) It was successful until now. Just like anything, you have to actually use it in order for it to work, right?

Anyways, these are creamy, comforting, and filling. I promise I didn't overeat this one. Next time I make these, I want to cram it with more veggies. I'm thinking a whole onion and a few bell peppers to start. Plus a jalapeno or two to up the burn. Sometimes I like to work up a little sweat when eating. Not in the disgusting meat-sweats kind of way, but the detoxing way. Can I please pretend that there's a difference?!

Am I the only one starting to feel a little pinch about Christmas all of a sudden racing straight towards me? Mostly, that's a good thing, but sometimes, I get a little panicky thinking about how I'm planning on doing mostly homemade gifts and have maybe 10% done...

I should probably just have another enchilada and chill out. No more Oreos though for this chick! 


Spicy Avocado Chicken Enchiladas
Adapted from this recipe
Makes 6 enchiladas

1 tablespoon unsalted butter
1/2 medium white onion, roughly chopped
3 cloves garlic, finely chopped
1 cup chicken broth
2 large chicken boneless, skinless chicken breasts, cooked and shredded with a fork
1 teaspoon cumin
1/8 teaspoon cayenne powder
1/8 teaspoon chipotle powder
1 cup salsa verde
1/2 cup full-fat sour cream
Small handful of cilantro, finely chopped
2 teaspoons lemon juice
2 avocados, diced
1/8 teaspoon black pepper
Pinch of sea salt
6 flour tortillas
1 cup shredded cheddar cheese
1 cup shredded Monterey Jack cheese

In a medium-sized saucepan, warm butter over medium heat and cook onions until lightly browned, stirring occasionally. Add garlic and cook for about 30 seconds. Stir in chicken broth. Cook down until sauce reduces and thickens slightly.

Add chicken, cumin, cayenne, and chipotle powder, stirring until chicken is fully coated. Remove from heat.

Preheat oven to 350 degrees F.

In a small blender, combine salsa verde, sour cream, cilantro, lemon juice, 1/2 avocado, pepper, and salt. Blend until smooth and creamy.

Spread a thin layer of sauce over the bottom of a 9x13-inch baking pan. Combine chicken filling with remaining avocado and divide among tortillas. Roll up tortillas and place in a single layer in pan. Pour avocado sauce over enchiladas and sprinkle with cheeses.

Bake until warmed through for 15-20 minutes.


Pinit

Monday, December 10, 2012

Giant Peppermint Oreos


I've been trying to schedule my posts for Monday, Wednesday, and Friday early in the morning, but my mom and dad came down to do their Christmas shopping this past weekend. We pretty much did nothing but shop, go out to eat, and relax. Can't really complain about that...but I didn't get much blog work done.

On the plus side, our house was oddly clean.

Even though we shopped almost all day on Saturday, all I bought was 2 pairs of socks. Boring. I guess I shop better under pressure, but I'll probably be super annoyed with myself in a week and a half. I guess it's the super frugal part of me that's been hard to shake. When we were younger, my sisters would get so mad at me because I'd come home from a trip with more money than I took! I'm still not sure how I pulled that off.

We went to Cheesecake Factory on Saturday night, which is always a success. (Any one else love that their burrito is as big as your forearm?) Although I did end up getting a massive headache and didn't dig into my cheesecake until yesterday. I have figured out that the perfect storm for me getting a headache is being dehydrated and going too many days without an adjustment. I really have no excuse for the adjustment because Nick's a chiropractor and we have a table in our living room. On a related note, I'd love if somebody came to decorate my place! The decor is mixed/dysfunctional at best. I have the tree part handled, but the rest could sure use a boost.


Last week while shopping at Trader Joe's we picked up some peppermint Joe Joe's. Obviously, they tasted really good, which inspired me to make a homemade version. If somebody has seen a recipe for the ginger white chocolate-dipped version, let me know! I tried one of my mom's and would love to have a recipe!


Peppermint Oreos
Adapted slightly from this recipe
Makes about 16 large sandwich cookies

Filling
About 1 cup of vanilla buttercream frosting (I used a portion of this recipe) 
1/2 teaspoon peppermint extract 
10 Andes peppermint crunch thins, finely chopped 

Cookie
1 cup (2 sticks) unsalted butter, at room temperature
2/3 cup sugar
1 large egg
1 teaspoon vanilla extract
1 teaspoon strong coffee, optional
2 cups all-purpose flour
3/4 cups cocoa powder
1 1/2 teaspoons baking powder
1 teaspoon sea salt

In a small bowl, stir the frosting, peppermint extract, and Andes together.

In a large bowl, cream together the butter and sugar on medium speed until light and fluffy. Beat in egg, vanilla, and coffee until fully combined.

In a medium bowl, sift together the flour, cocoa powder, baking powder, and sea salt.

Slowly add the dry ingredients to the butter until fully incorporated.

Cover and chill in the refrigerator for at least 1 hour.

Preheat oven to 350 degrees F.

Roll out dough on a lightly floured surface until about 1/8- to 1/4-inch thick. Using a circle cookie cutter, cut out circles and transfer to parchment-lined cookie sheets.

Bake for 12-14 minutes and transfer to a wire rack to cool.

Once cookies have cooled, put a heaping tablespoon of filling in the middle of a cookie, top with another cookie, and slowly press together, moving the cookies in small circles to spread the filling. Once you do this once, you'll see what I mean.

They are best served at room temperature. If you store them in an airtight container, they will soften slightly, but still be pretty crisp.


Pinit

I'm linking up this recipe at Thistlewood Farms, Taste and Tell, DJ's Sugar Shack, Back For Seconds, Lady Behind the Curtain, Crazy For Crust, Sweet 2 Eat Baking, One She Two She, Something Swanky, & Design Dining and Diapers.
Sweet 2 Eat Baking

Friday, December 7, 2012

Chocolate Peppermint Cake Balls


So this officially begins the Christmas baking...

Just like my Peppermint Overload Brownies, there is no shortage of peppermint in these. Compared to brownies, these look so much more festive and impressive. People will think you're so talented and artsy!

Bakerella is the queen of cake balls/pops. In many of her recipes, she uses store bought cakes and store bought frosting. That's why I have listed either a cup of frosting (if using homemade) or 16 ounces if you're buying it. Chances are you won't need all of it especially if you use a super moist cake recipe like I did.

And yes, it was really bothering me that they started sweating almost immediately. Oh well, it's something I'll have to live with. Because I split this process over two days, they were frozen solid when I put the chocolate on. Hopefully you don't have to roll that way. If you do, it won't be the end of the world. People will be too impressed by the fact that you made cake balls to worry much about the sweating. By the way, can that sound anymore disgusting?

There's a triple-shot of peppermint in these and although I'm not showing it here, the inside has those same flecks of red...Naughty, I know.

These would make great Christmas presents, in case you've been wondering!


Chocolate Peppermint Cake Balls
Makes about 35 

1 teaspoon peppermint extract
1 cup or at least 16 ounces vanilla buttercream (this or your favorite recipe)
1 recipe chocolate cake, fully baked and cooled (I used this recipe and it rocks)
15 Andes peppermint crunch thins, finely chopped
1 pound dark chocolate, roughly chopped (I use the bittersweet bar from Trader Joe's, which also rocks)

In a small bowl, stir peppermint extract and all but 2 tablespoons of Andes into 1 cup of frosting.

Crumble the cake into a large bowl using your hands or a wooden spoon. Add about 1/2 cup of frosting and stir until fully incorporated. The mixture should roll into a tight ball with your hands if you've added enough frosting. If necessary, continue to add frosting until the desired consistency is achieved. If you need more than beyond what you've flavored with peppermint, it will be fine.

Line a large baking sheet with waxed paper. Roll cake into tablespoon-sized balls. If you have a cookie scoop, it's the perfect size.

Place in freezer to firm up for at least 30 minutes.

Once cake balls have firmed up, melt chocolate over a double boiler or in a heat proof bowl set over a pot of simmering water. If you want to get really fancy, you can temper your chocolate.

Have the remaining 2 tablespoons of Andes peppermint crunch thins in a bowl nearby. Using a large spoon, dunk each cake ball into the melted chocolate and roll it around until fully coated. Try to tip off the extra chocolate and place the cake ball back on the wax paper pan. Immediately sprinkle the cake ball with a pinch of Andes.

The pan can be placed back in the freezer to set the chocolate if necessary.


Pinit

I'm linking up this recipe at I Heart Nap Time, 33 Shades of Green, DJ's Sugar Shack, and One Project Closer.

Wednesday, December 5, 2012

Spicy Apple Meatballs


I feel so much more comfortable now that meat's back on the table! I'm totally out of my comfort zone making meatless main dishes, although it is kind of fun to try something new. Speaking of comfort, meatballs = comfort. After a night like last night, I sure could use some comfort. When I'm used to our baby going to bed at 7 or 8, it's real rough when she parties until midnight. Of course this happens to be on the day I've committed myself to going to bed at 10! Ok, I'm kind of over it now. Enough drama for today. Please?

I was expecting these meatballs to have more apple flavor, but the apple juice really adds a little sweetness to the glaze, more than anything. These have a little bit of an Asian flair, but not overly so. And the spiciness is not sweat-inducing, even though they are called Spicy Apple Meatballs. Our 1 1/2-year-old handled them just fine. Doing a 50/50 mix of beef and sausage makes them a little more interesting than your average meatball as well.

Guys, overall, these were probably the best meatballs I've ever had. Granted, I'm not exactly a meatball connoisseur, but who is? Well, I suppose Italians probably are!


Spicy Apple Meatballs
Adapted from this recipe
Makes about 35 meatballs

1 tablespoon extra-virgin olive oil
2 large eggs
1/2 cup whole milk
1/2 cup ground oats
1 pound 80/20 ground beef
1 pound sweet Italian pork sausage, casings removed
7 cloves garlic, minced
3/4 teaspoon pepper
1/2 teaspoon sea salt
1/4 teaspoon cayenne pepper

Glaze
2 cups apple juice (preferably one with very few ingredients and no added sugar)
2/3 cup liquid aminos or a very low-sodium soy sauce
2 tablespoons honey
1 1/2 teaspoons cornstarch
1 teaspoon fresh ginger, peeled and grated

6 green onions, green parts finely chopped

Oil a 9x13-inch pan and an 8x8-inch pan with the olive oil. Preheat oven to 375 degrees F.

In a large bowl, combine eggs, milk, and oats. Let stand for 5 minutes so the oats can absorb some of the moisture. Add beef, pork, garlic, pepper, salt, and cayenne pepper. Mix until thoroughly combined with your hands or a wooden spoon.

Form into tablespoon-sized meatballs and arrange in oiled pans. Bake for 20 minutes.

Meanwhile, in a small bowl, whisk together the apple juice, liquid aminos, honey, cornstarch, and ginger.

Cook the glaze in a medium saucepan over medium heat until thickened into a thick-but-still-runny glaze, whisking occasionally. Remove from heat.

Pour glaze over the meatballs and bake for an additional 5 minutes.

Transfer meatballs to serving dishes and drizzle sauce from the pan over them, if desired. Garnish with green onions and serve immediately.


Pinit

I'm linking up this recipe at DJ's Sugar Shack, Cast Party Wednesday, and Back For Seconds.

Monday, December 3, 2012

Cauliflower Pasta (For Ev, Part II)


Last week I had apple pear hand pies for my friend Ev. If you missed it, she's currently in the Peace Corps in Armenia and she asked me to prepare a meal and dessert she could make using available ingredients. The list is somewhat limited compared to what we have here which made it kind of challenging.

The dessert was easy. Fruit, butter, flour, done. But I'm a huge meat-eater, so doing an actual vegetarian meal was quite interesting. I obviously wanted to do something she could replicate over there, that was full of veggies, (health nut that I am!) and hopefully wouldn't be too expensive.

This is a simple pasta that comes together pretty quickly and relies on pantry staples. Plus, it should withstand Ev's lack of refrigeration! I simplified the recipe a little since I'm pretty sure saffron would be astronomical there, if able to be found at all. Heck, I don't even buy the stuff.

I've listed a few ingredients as optional in cause they aren't readily available in Armenia. I took a chance on lemons with the hand pies and got lucky...Phew.

For any of you trying to sneak more vegetables into your kids, this is a great way to do it. You can mash the cauliflower as fine as you need to disguise it. Thankfully my girl eats cauliflower just fine. For now.


Cauliflower Pasta
Adapted from this recipe
Makes 4 large servings

1 head cauliflower, cut into small florets
3 tablespoons butter
1 yellow onion, finely chopped
3 garlic cloves, finely chopped
Pinch of red pepper flakes, optional
1/3 cup golden raisins
2 tablespoons tomato paste
2 bay leaves, optional
1/2 teaspoon salt
1/2 teaspoon pepper
1 pound small pasta (I used brown rice fusilli)
1 tablespoon lemon juice
2 tablespoons chopped hazelnuts, optional
2 tablespoons flat leaf parsley, roughly chopped, plus more for garnish

Place the cauliflower in a large pot with a steamer and a small amount of water in the bottom. Cover and steam for about 8 minutes. If you don't have a steamer, fill the pot about halfway with water, bring to a boil, and boil until cauliflower is soft. Remove from water and drain, reserving the water for cooking pasta and thinning the sauce.

In a large saucepan, melt butter over medium-high heat and cook onion, stirring occasionally until soft.

Add the garlic and red pepper flakes, cooking about 30 seconds.

Stir in the cauliflower, mashing the florets with a fork or spoon until there are few or no chunks.

Add in the raisins, tomato paste bay leaves, salt and pepper, and about 1/2 cup cauliflower water or fresh water. Allow to cook for about 5 minutes.

Meanwhile, cook the pasta according to the package directions. Drain and add to the cauliflower along with the lemon juice and parsley. Remove the bay leaves.

Garnish with hazelnuts and additional parsley if desired.


Pinit


I'm linking up this recipe at Mostly Homemade Mondays.